Monday, May 16, 2011

Matchbox Notepad

I have always thought those mini matchbook notepads were so cute, so this week I designed a few for the Silhouette Online Store.

They are fairly simple to assemble but here is a quick tutorial to clear up any questions:

1. Fold outside cover of matchbook notepad along perforations.


2. Insert blank white pages (cut out of regular weight printer paper) under bottom flap and staple. I estimate that around 14 pages is all my stapler could handle, but test it on your own stapler. It could fluctuate based on your paper weight!


3. Fold over the cover and tuck it under the bottom flap, above the staple. It's that simple!

Thursday, May 12, 2011

Fabric Flower Brooches

A few weeks ago my friends and I threw a baby shower (I know! Another one! But I think we are done for a while...) for two expecting mothers-- one expecting a girl and one expecting a boy. We played off of "boy vs. girls" for the shower theme, and divided the guests into teams as they arrived.

To divide them into teams, we had them pick a fabric flower pin to wear. Pink to represent the girls team and blue to represent the boys team. The games we played were pretty chill-- actually the whole shower was pretty chill-- my favorite kind! And, as a bonus, the flowers acted as a great favor! I'm all about party favors that will actually be used after the shower.


I basically followed this rolled fabric flower tutorial from My Sparkle with a few changes-- I backed it with felt, glued a safety pin to the felt to use to secure the brooch, and added some fabric leaves!

Monday, May 2, 2011

Teapot for Silhouette


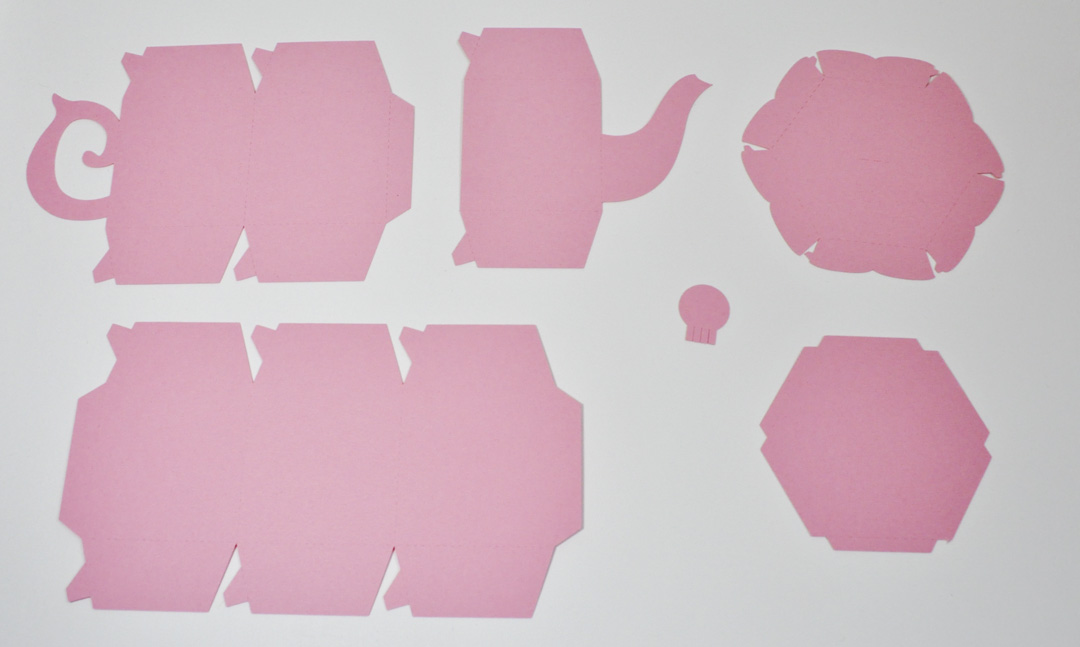
Hey! This week in the Silhouette Online Store, watch for my 3D teapot design. I am including some pictures and instructions on how to assemble it in this post.

1. Cut out all pieces.


2. Fold along perforations. (but i don't fold the ones along the top of the teapot until for ease of assembly.)


3. Use tabs along the length of the teapot body to glue it into a hexagon shape.


This is what it looks like after you glued all the sides together.


4. Use the tiny tabs along the bottom of the teapot to glue the panels together, so that it tapers in.


This is what it looks like when you glue all the bottom panels together.


5. Take the hexagon shape and fold all the tabs, and glue them. Then take the piece and set it in the bottom of the teapot.


6. Fold perforations along the top of the teapot.


7. Use tabs to glue top panels together.


8. Take the little circle and stick it thru the slit on the top of the lid.


9. Turn lid over. Fold and glue the little tabs down to keep the handle in place.


10. Last step! Glue the little tabs on the side of the lid to adjacent panels.